In this tutorial, we’ll build a simple contact form with Laravel. You will learn how to work with controllers, models, routing, and Laravel views here. We are going to use to fresh Laravel project we have initialized in the previous post concerning the initiation to Laravel. If you are new to Laravel, we advise you to read that post first to discover what Laravel is and the folder structure of a fresh Laravel project.
This blog post is a part of a series that introduces you to the Laravel world by building a simple contact form protected by Google ReCaptcha and an admin panel to manage messages sent through our contact form.
- Part 1: Your Amazing Initiation to Laravel Framework
- Part 2: How to build a contact form with Laravel Framework(This tutorial)
- Part 3: A simple admin panel for a Laravel contact form
- Part 4: How to build an authentication system with Laravel
- Part 5: How To Easily Delete Multiple Records In Laravel Using Checkbox
- Part 6: How To Add A Beautiful Delete Confirmation Message In Laravel
- Part 7: How to protect your Laravel forms with Google reCAPTCHA V3
Presentation of the project
The project we are going to build is a simple contact form with three fields:
- The name
- The email
- The message
When the user will submit the form, we’ll record that information in our database. If you are ready, let’s jump in.
We will use one PHP artisan command to generate our model, controller, and migrations. It’s here where Artisan commands become very handy to work with Laravel.
php artisan make:model Contact -m -c
The above command will create a model called Contact, the corresponding controller called ContactController, and finally the corresponding migrations.
The migrations
Our contact form will have three fields that we need to store in our database. Then, we must add those fields in the migrations files reserved for the Contact model.
Navigate to the database->migrations folder and open the file ending by create_contacts_table.php. In that file, add the following line of code as shown in the below picture.
$table->string('name');
$table->string('email');
$table->text('message');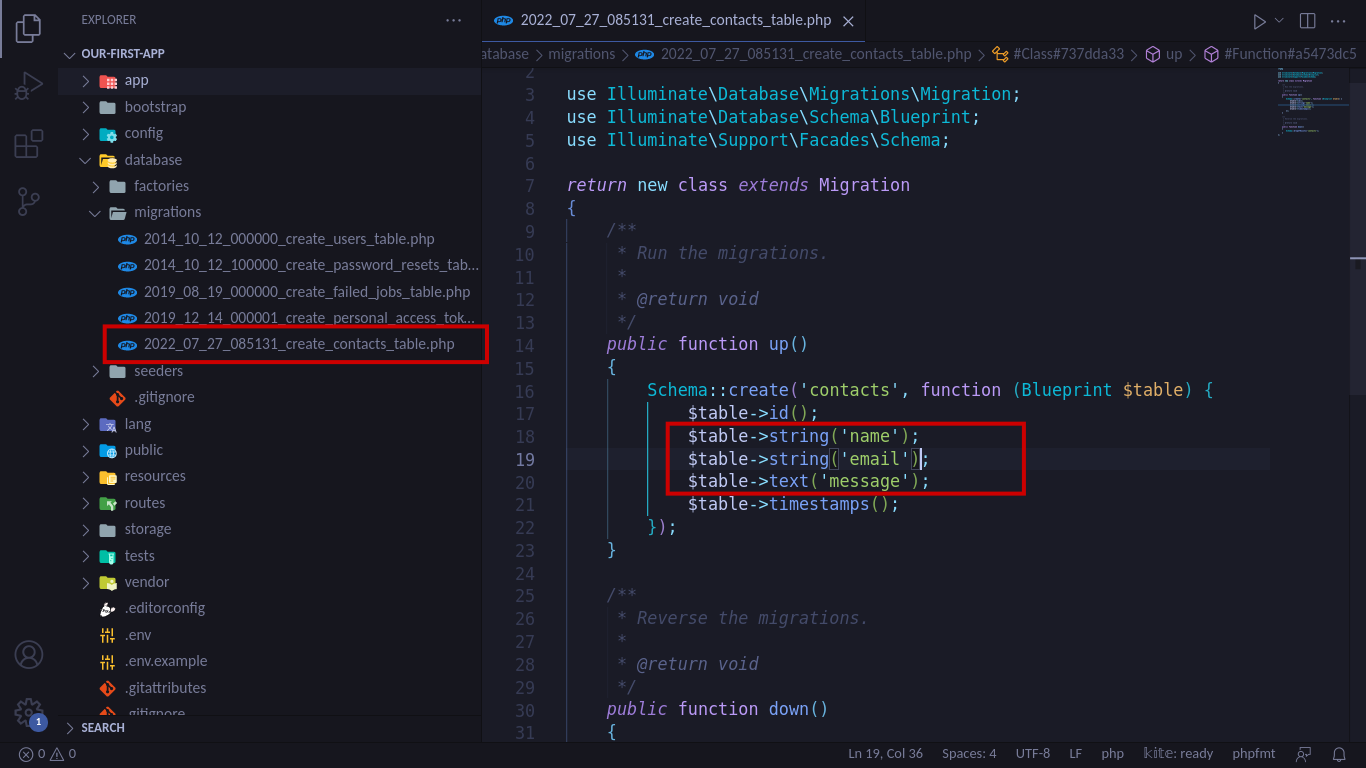
The complete code for this file is the following.
Database connection
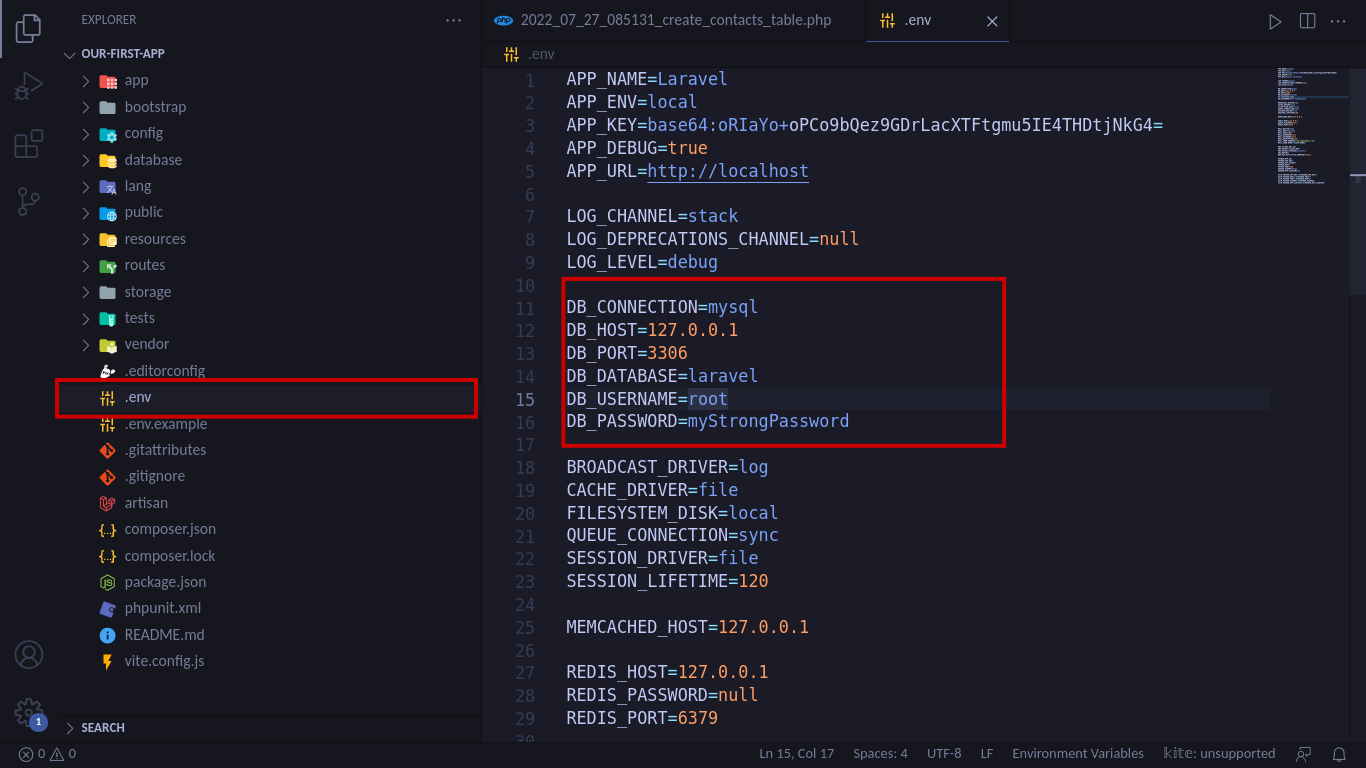
The next step is the configuration of the connexion to a database. Login to your database through a command line interface or via the phpMyAdmin web interface and create a database called our_first_app. After creating that database, come to the .env file and configure the database connexion like this:
DB_CONNECTION=mysql
DB_HOST=127.0.0.1
DB_PORT=3306
DB_DATABASE=our_first_app
DB_USERNAME=root
DB_PASSWORD=mystrongPassword
Note: The DB_USERNAME is the username (in my case root) you use to connect to your DBMS(Database Management System) MySQL/MariaDB, and DB_PASSWORD is the password you use for that connexion (mystrongPassword in my case).
After configuring the access to a database by our application, we can apply migrations with the command:
php artisan migrate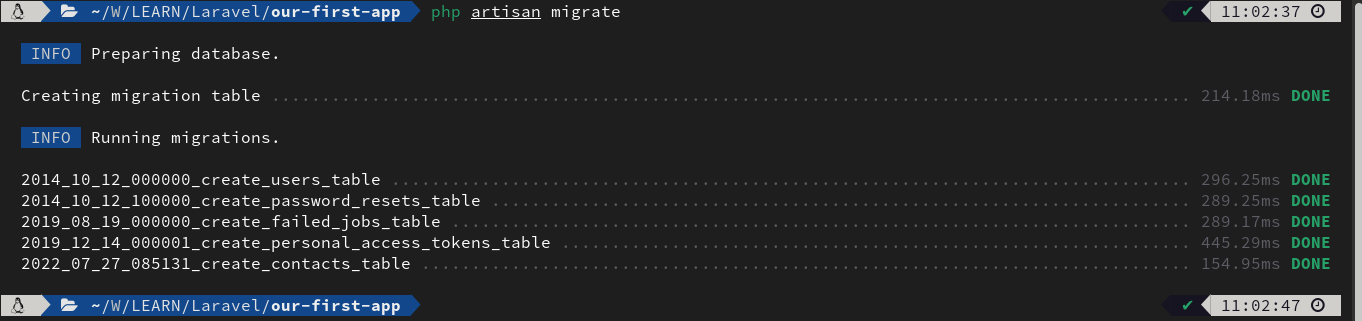
The Contact models
The following step is to edit our Contact model file to add fillable attributes. The fillable attributes are the fields of the table that can be filled from an array to directly create a new record in our database.
Navigate to app -> Models and open the Contact.php file to add the fillable attribute like this:
 protected $fillable = [
        'name',
        'email',
        'message'
    ];
The complete code for this file is the following:
The ContactController file
The contact controller has two functions:
- The index function which is responsible to show the contact form locate at resources/views/contact.blade.php
- The store function is used to store the information sent by the users in the database.
Let’s explain a little bit the different parts of the store function.
$this->validate($request, [
            'name' => 'required',
            'email' => 'required',
            'message' => 'required'
        ]);
This piece of code is used to validate the user request. It checks in the request sent by the user whether there are name, email, and message attributes there; otherwise, the request is aborted.
$requestData = $request->all();Once the request has all the attributes, the previous code is used to retrieve all the data sent by a user from the Request object. Those data will be saved in the variable $requestData in a form of an array. For example:
$requestData = [
     'name' => 'John',
     'email' => 'john@example.com',
     'message' => 'A test message'
]
The following code will use the $requestData array to create a Contact object and store it in the database. This process is made easy thanks to the fillable attribute we have set in the Contact models
Contact::create($requestData);The last line redirects users to the contact view with a success message. The complete code for this file is the following:
The routing
Now, we’ll add two routes in the routes/web.php file: One to show the contact form and the other one to submit the data entered in the contact form by the users. The complete code of this file is the following.
Here, we have first imported the ContactController class. After that, we have created routes according to what HTTP method we want them to be accessible. The first argument of those methods is the route that will be used in the web browser, the second argument is the controller where to route the request and the method responsible for handling the request.
The views
The last part of this tutorial concern the view file. So, go to the folder resources/views and create the file contact.blade.php and paste in the following code.
In the form tag, we specify that we want to send our data using the POST method to the route “/send-message”.
The @csrf is responsible to generate a CSRF(Cross-Site Request Forgery) token to protect our application from CSRF attacks via our contact form.
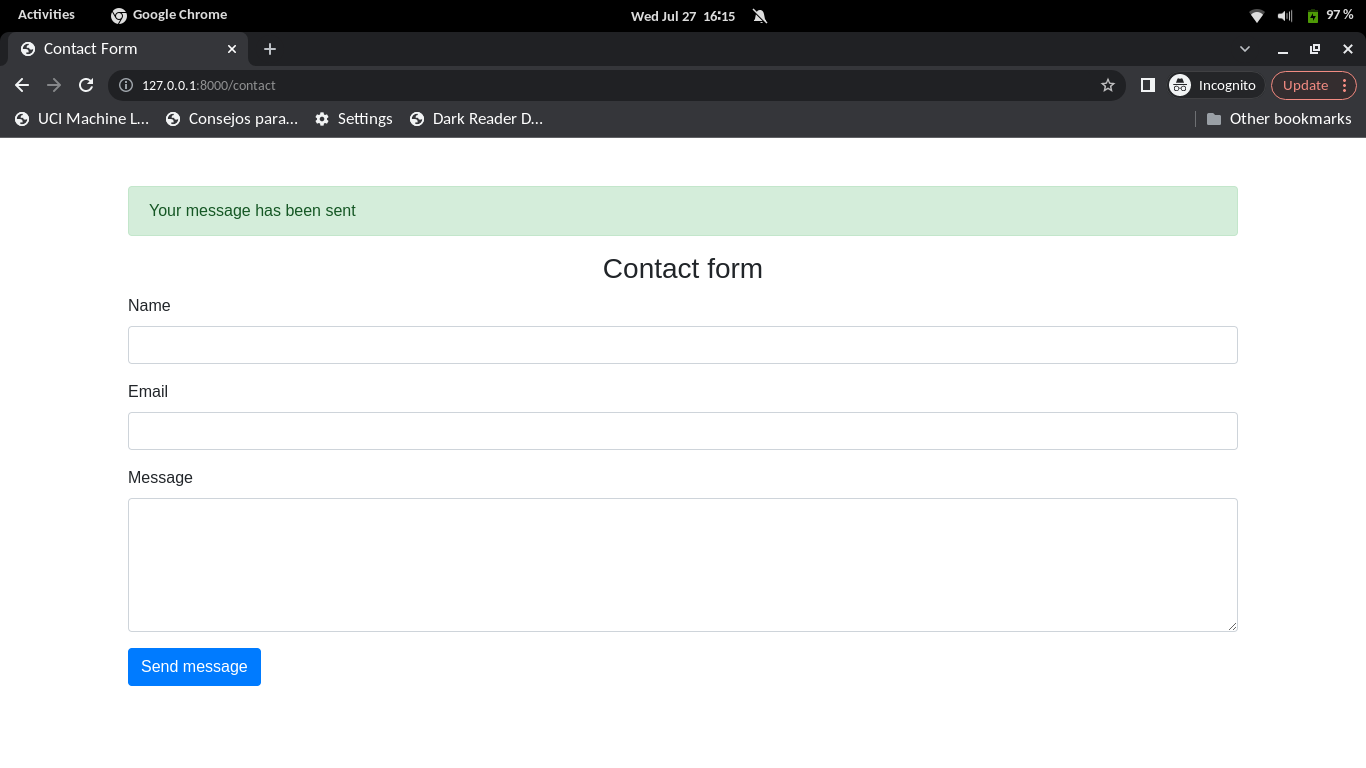
The code below is responsible to display a success message once we successfully recorded the request of the user.
@if (session('status'))
<div class="alert alert-success">
{{ session('status') }}
</div>
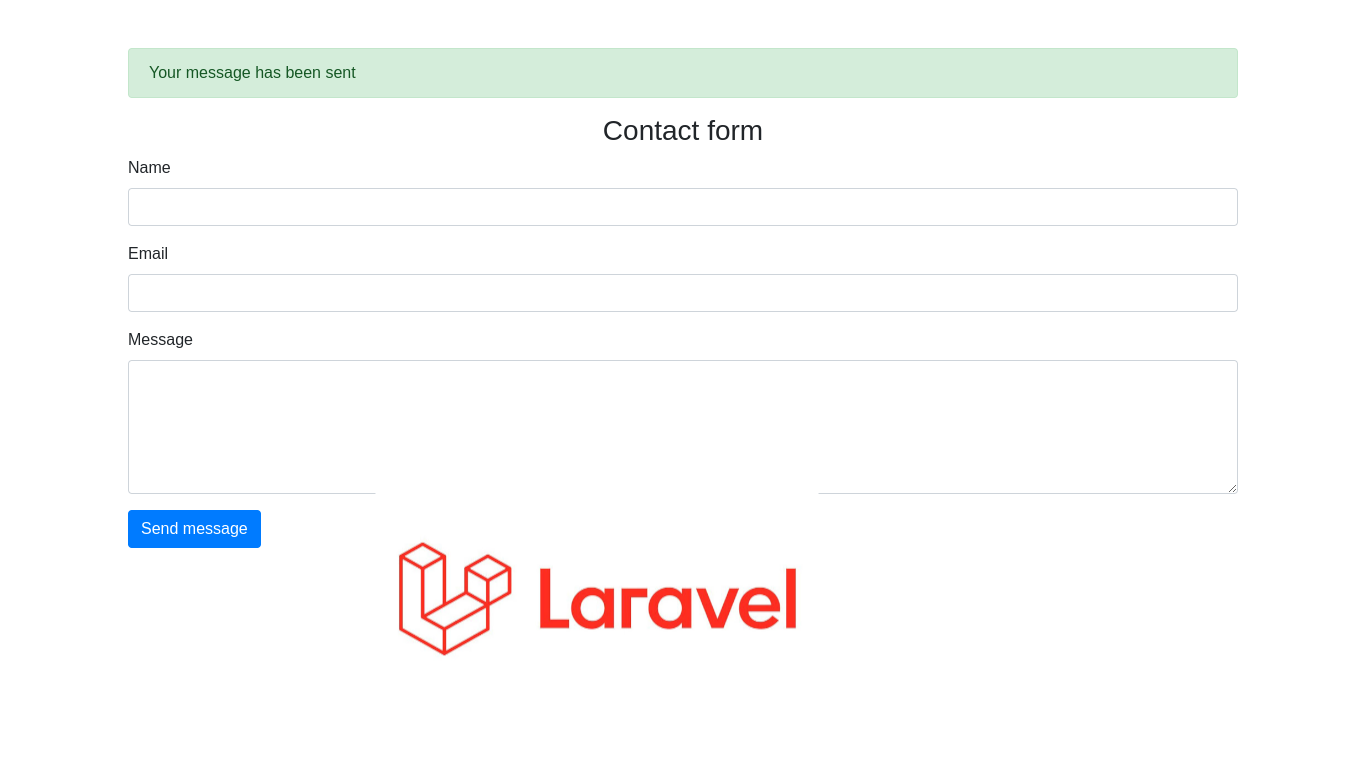
@endifFinally, let’s test our amazing contact form
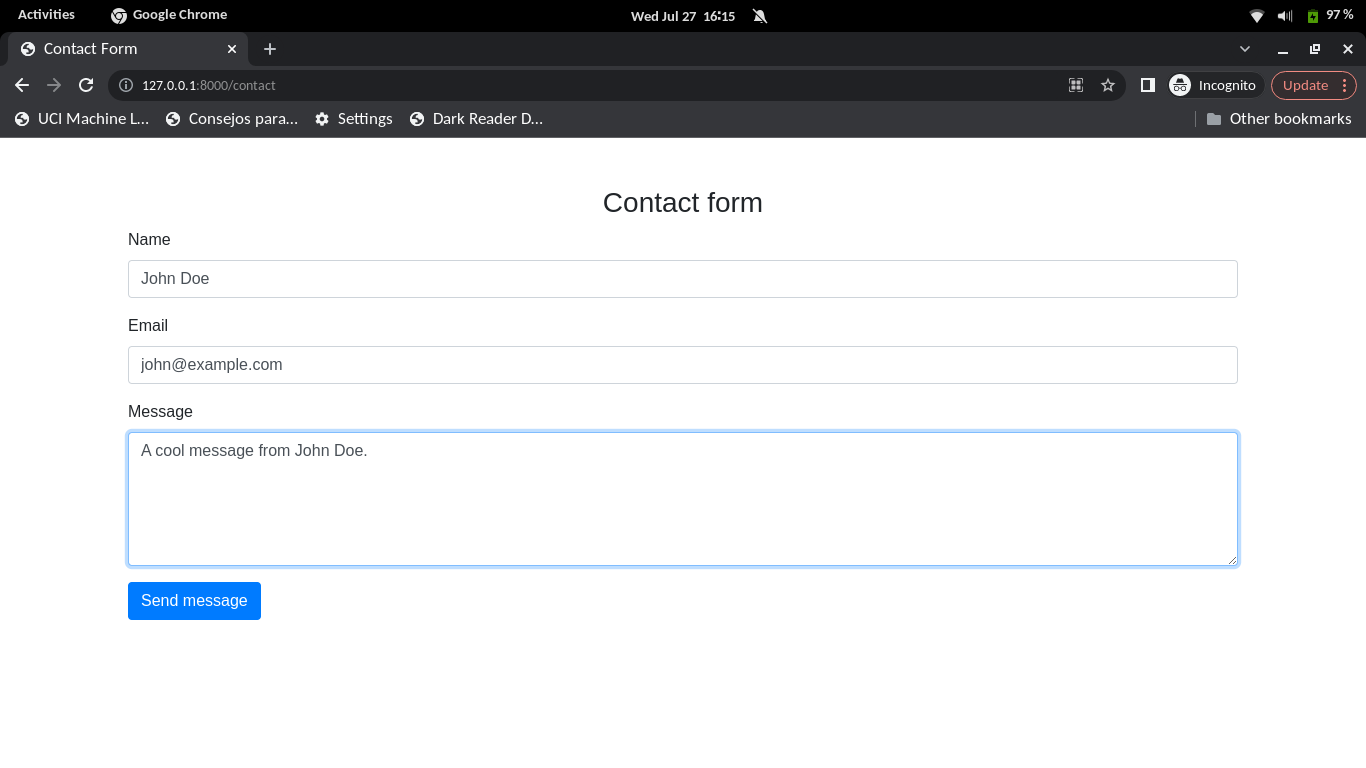
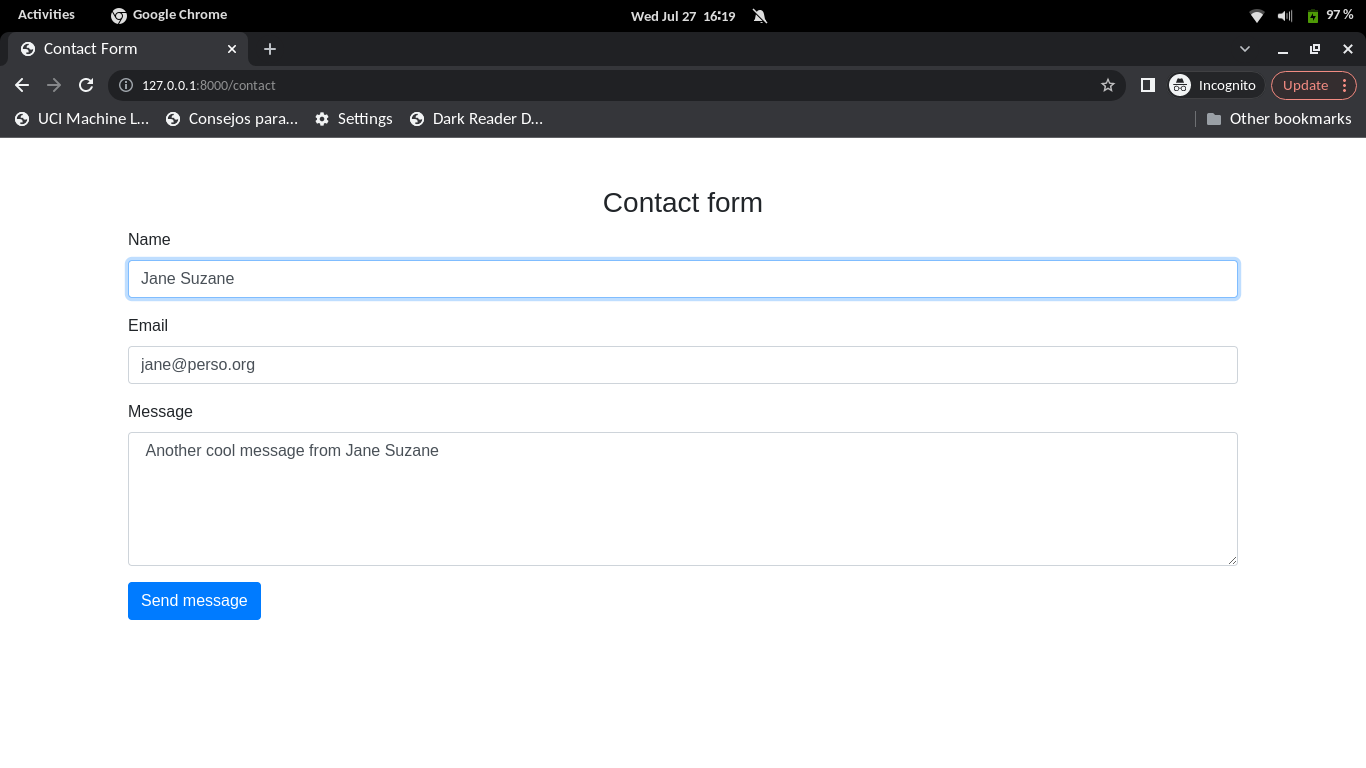
Start your server with the command php artisan serve and go to http://127.0.0.1:8000/contact to test the contact form.

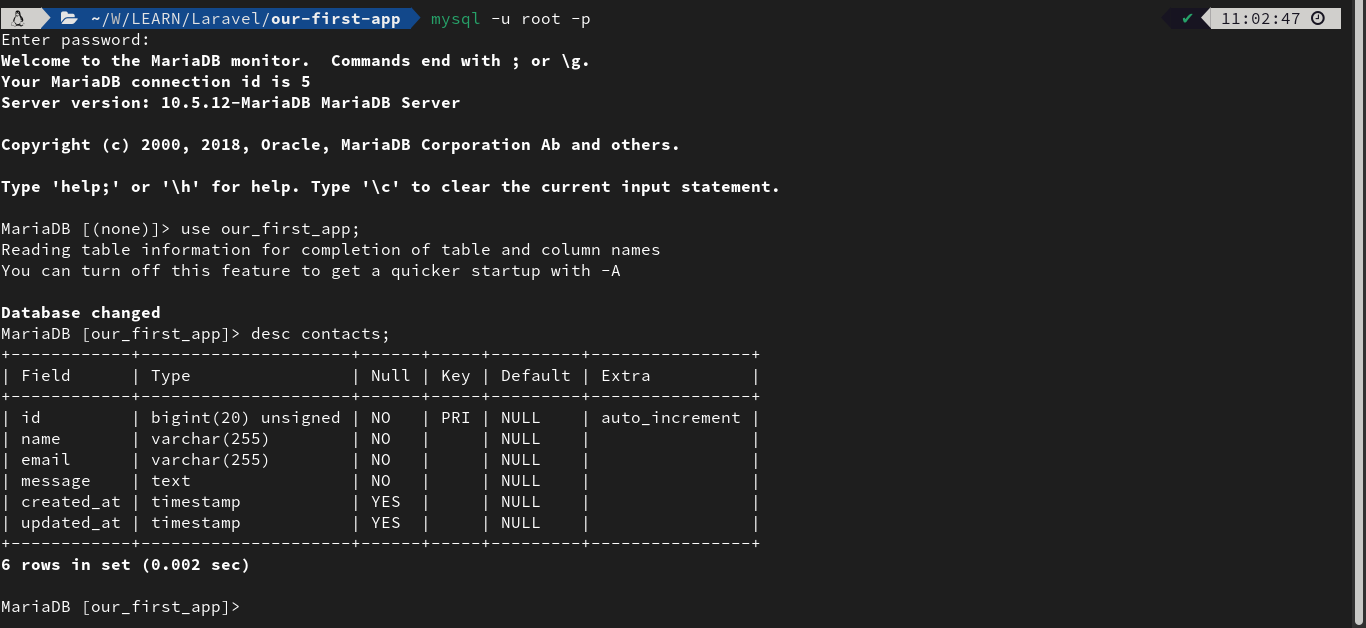
Now, Check the result in your database if the message was successfully recorded.

Conclusion
In this blog post, we have explained to you how to build a simple contact form using the Laravel Framework. We have explored the core concepts of Laravel that are used to build complex applications. In the next tutorial, we’ll build a simple admin panel to view the message sent by users via our contact form. You can find the complete code for this tutorial here. Hope we have enjoyed it. If you have any questions, leave a comment, and we’ll quickly reply to you.
Hi, I’m Derick. I am a Software Engineer and DevOps pro. I specialize in turning complex business needs into automated workflows using Python, Odoo, and Go. I write engineering case studies here—sharing the architectural decisions and real-world code behind the solutions I build.
7 thoughts on “How to build a contact form with Laravel Framework”