When you build an admin panel, you generally need to add a shortcut feature to delete multiple entries in one click. In this blog post, we’ll explain how to delete multiple records using the checkbox in Laravel.
This blog post is a part of a series that introduces you to the Laravel world by building a simple contact form protected by Google ReCaptcha and an admin panel to manage messages sent through our contact form.
- Part 1: Your Amazing Initiation to Laravel Framework
- Part 2: How to build a contact form with Laravel Framework
- Part 3: A simple admin panel for a Laravel contact form
- Part 4: How to build an authentication system with Laravel
- Part 5: How To Easily Delete Multiple Records In Laravel Using Checkbox (This tutorial)
- Part 6: How To Add A Beautiful Delete Confirmation Message In Laravel
- Part 7: How to protect your Laravel forms with Google reCAPTCHA V3
In this series, we’re building a simple contact form with an admin panel. To follow this tutorial, download the source we produced in the previous tutorial here.
The list-messages.blade.php view file
To complete this task, we’ll need some JavaScript libraries such as JQuery, and Sweetalert2.
The JQuery library

JQuery is a small and fast JavaScript library that facilitates the manipulation of DOM(Document Object Model). We’ll include it in our file using the following CDN(Content Delivery Network):
<script src="https://ajax.googleapis.com/ajax/libs/jquery/3.5.1/jquery.min.js"></script>The Sweetalert2 library

Sweetalert2 is a beautiful, responsive, and highly customizable JavaScript library with the aim to replace regular JavaScript popup boxes. We’ll use this library to ask for confirmation before proceeding with the deletion of records. It is integrated into our project using the following CDN:
<script src="https://cdn.jsdelivr.net/npm/sweetalert2@11"></script>The JQuery TableCheckAll plugin
The JQuery plugins are the way to expand JQuery functionalities. We are going to use one of them called TableCheckAll to implement our multiple delete feature. To add this plugin to your project, clone the project using the following command:
git clone https://github.com/codeanddeploy/Jquery-Table-Check-All-Plugin.gitNavigate to Jquery-Table-Check-All-Plugin/dist folder and copy the file TableCheckAll.js to our Laravel project into the folder public/js/plugins or where you want in the public folder.
If you have pasted the file in the directory we have indicated above, use the following code to associate that file with our view file.
<script src="{{ asset('js/plugins/TableCheckAll.js') }}"></script>The csrf-token
We will make a request to delete messages through Ajax request. Each request must have a csrf-token in its header. To be able to use csrf-token in JavaScript, we’ll add it in the header of our file as metadata. The code is the following:
<meta name="csrf-token" content="{{ csrf_token() }}">The JavaScript code
The complete script code is the following:
We’ll explain this code in detail.
$(document).ready();This is a JQuery function that allows us to only execute a code when the page we are on is ready to facilitate our manipulation of DOM. Inside this method, we initialize the JQuery TableCheckAll plugin on the table with the id messages.
After that, we selected the delete all button with their id multiple-delete and add a click event on it. Once the user clicks on it, we retrieve all the id of the row the user has selected and add them to the selected array like show in the code below.
$("#messages .check:checked").each(function() {
selected.push($(this).val());
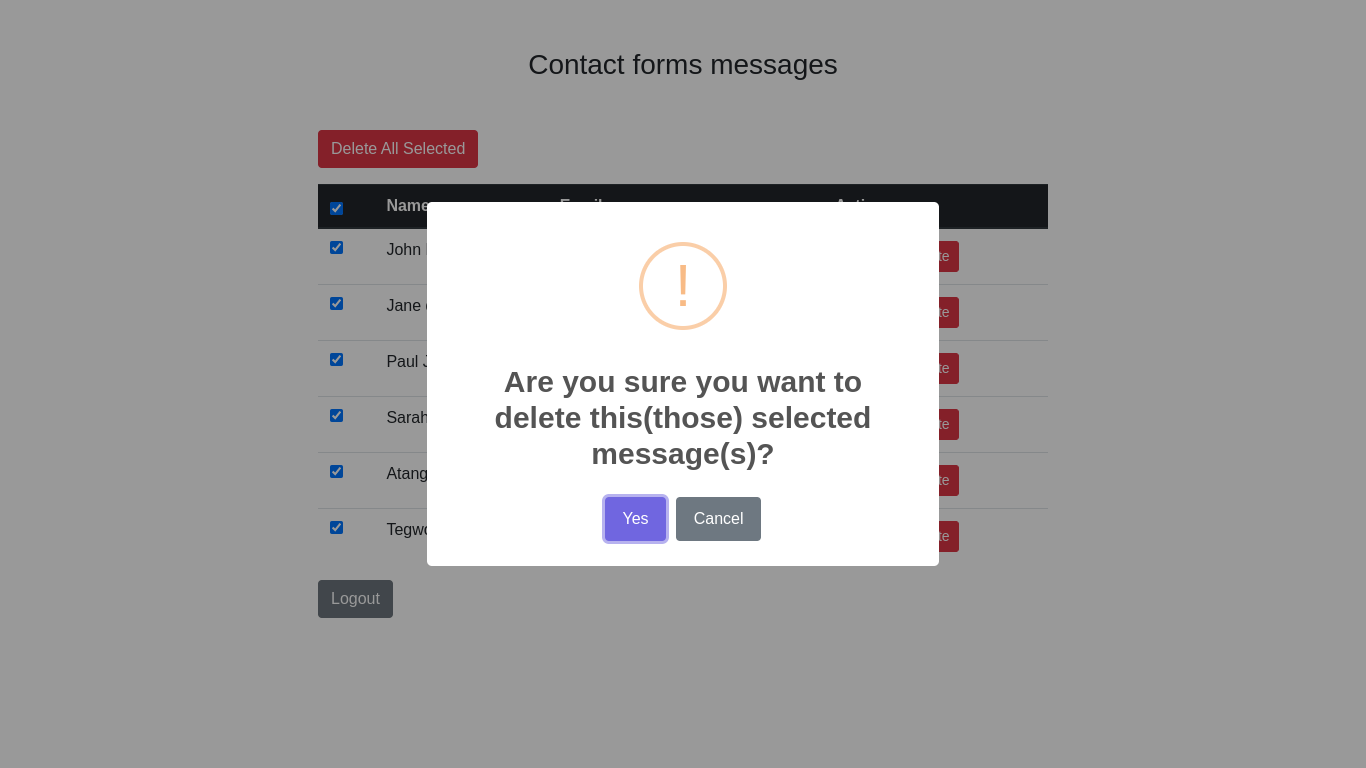
});From here, the rest of the code is pretty simple to understand. We just used the Sweetalert2 library to ask for confirmation before deleting the records.
The complete code of the file list-messages.blade.php is the following:
The routes/web.php file
It’s time to add the routes to make multiple records deletion. Open the file routes/web.php and add that route as shown in the code below:
Route::middleware(['auth'])->group(function () {
   ...
    Route::post("/admin/messages/multiple-delete", [ContactController::class, 'deleteMultipleMessages'])->name('multiple-delete');
    ...
});
The ContactController.php file
Open the file app/Http/Controllers/ContactController.php and add the following method:
public function deleteMultipleMessages(Request $request)
{
$ids = $request->get('selected');
Contact::whereIn('id', $ids)->delete();
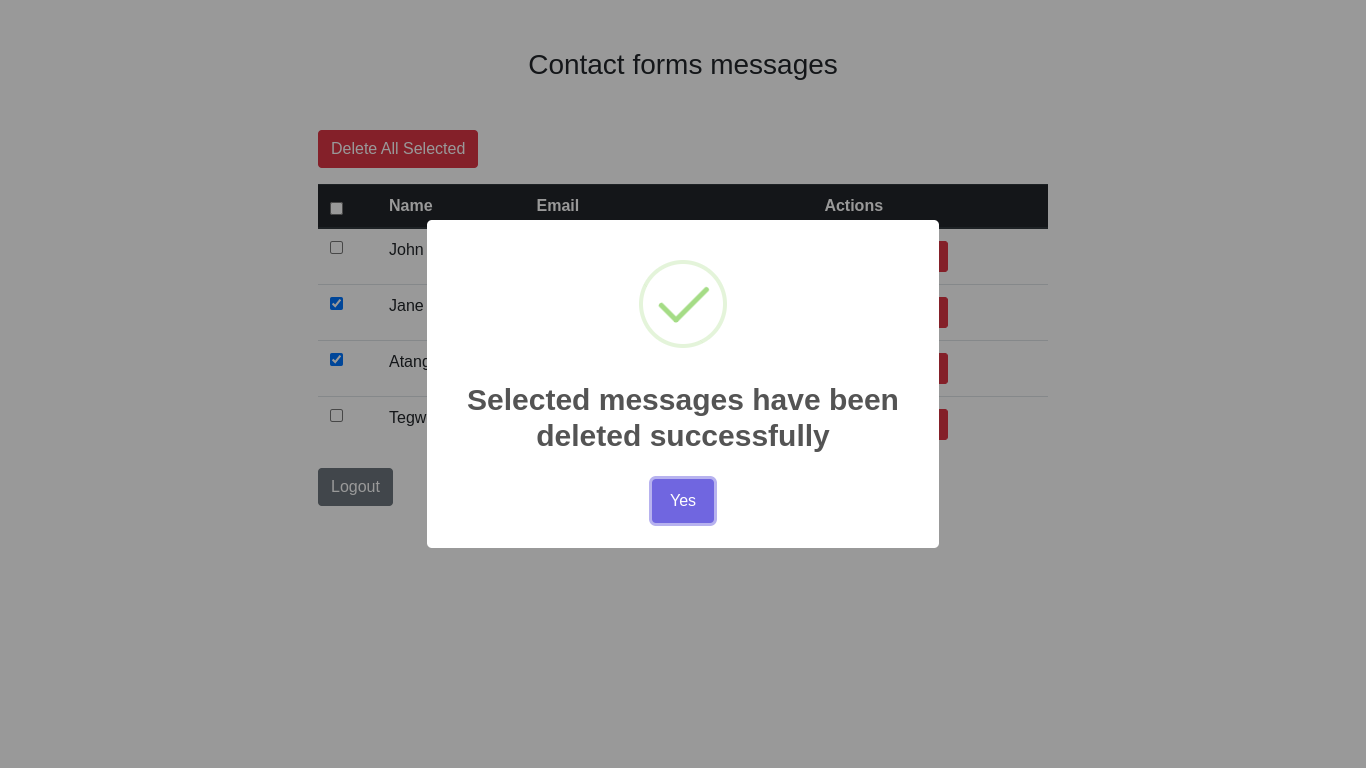
return response("Selected messages have been deleted successfully", 200);
}Here we retrieve the list of the messages id to delete from the request, delete all those messages and return the successful delete message in JSON format.
Testing
Start your development server with the command php artisan serve and try this feature in your admin panel.
Conclusion
In this blog post, we have explained how to implement multiple records deletion in Laravel using the checkboxes in a beautiful and simple way. If you encounter a problem in any step and need more explanation, just leave a comment below. The complete code for this tutorial is found here.
If development isn’t your field, consider hiring Laravel specialists who can supercharge your application’s scalability and performance with precision.

Hi, I’m Derick. I am a Software Engineer and DevOps pro. I specialize in turning complex business needs into automated workflows using Python, Odoo, and Go. I write engineering case studies here—sharing the architectural decisions and real-world code behind the solutions I build.


7 thoughts on “How To Easily Delete Multiple Records In Laravel Using Checkbox”