Our world is changing, both in our living habits and in our work habits. Today, a new tendency has been created called “work from home”, “home office” or “remote work”. This new tendency has been facilitated by web conferencing tools that allow people to perform business meetings, presentations, customer support, recruitment through interviews, and so on.
Many web conferencing tools have been developed over the past few decades. The major actors everybody knows are Zoom, Google meets, and Microsoft teams. These tools are very powerful but In some cases, people and organizations want to use web conferencing tools hosted on their servers under their control.
Fortunately, there are many open-source web conferencing tools developed and maintained by the community. Some of them that you can self-hosted on your server are BigBlueButton and Jitsi Meet. Today, we’ll guide you through a step-by-step guide to deploying Jitsi on your server.
What is Jitsi Meet?

Jitsi Meet is a free and open-source video-conference tool. The main features Jitsi offers are:
- Support for all current browsers
- Mobile applications
- HD audio and video
- Content sharing
- End-to-End Encryption
- Raise hand and reactions
- Chats
- Polls
- Virtual background
If you are in a situation you don’t want to self-hosted your Jitsi and worry about maintenance and other stuff, we can use Jitsi as a Service (JaaS).
Prerequisites
In this tutorial, we are going to deploy Jitsi in production on our server using docker. So there are some prerequisites before starting.
- A Linux Server with SSH and root access
- Docker and docker-compose installed on that server
- A domain name pointed to that server
To perform this tutorial, you can easily create a small droplet(Linux Server) for free on DigitalOcean. DigitalOcean offers 200$ free credits for 60 days. Everything being said, let’s focus on the tutorial.
You can check this tutorial if you use Ubuntu and don’t have Docker and docker-compose installed on it.
I-Deployment of Jitsi without reverse proxy server
Step 1: Download and unzip Jitsi
The first step is to download Jitsi from his GitHub repository to our server. We’ll use the following command to do that:
LATEST_VERSION=$(curl --silent https://api.github.com/repos/jitsi/docker-jitsi-meet/releases/latest | grep -Po '"tag_name": "\K.*\d')

wget https://github.com/jitsi/docker-jitsi-meet/archive/refs/tags/${LATEST_VERSION}.zip
Then, we’ll extract it using unzip command. Unzip is not available by default in a new installation of Ubuntu 22.04. We’ll use the following command to install it and unzip by the way Jitsi.
apt install unzip
unzip ${LATEST_VERSION}.zip
Let’s rename that folder with a simple name.
mv docker-jitsi-meet-${LATEST_VERSION} jitsi
Step 2: Configure Jitsi for deployment
Let’s enter into the project folder and create the environment file.
cd jitsi && cp env.example .envLet’s set strong passwords in the security section options of the .env file using the scripts provided by the Jisti team.
./gen-passwords.sh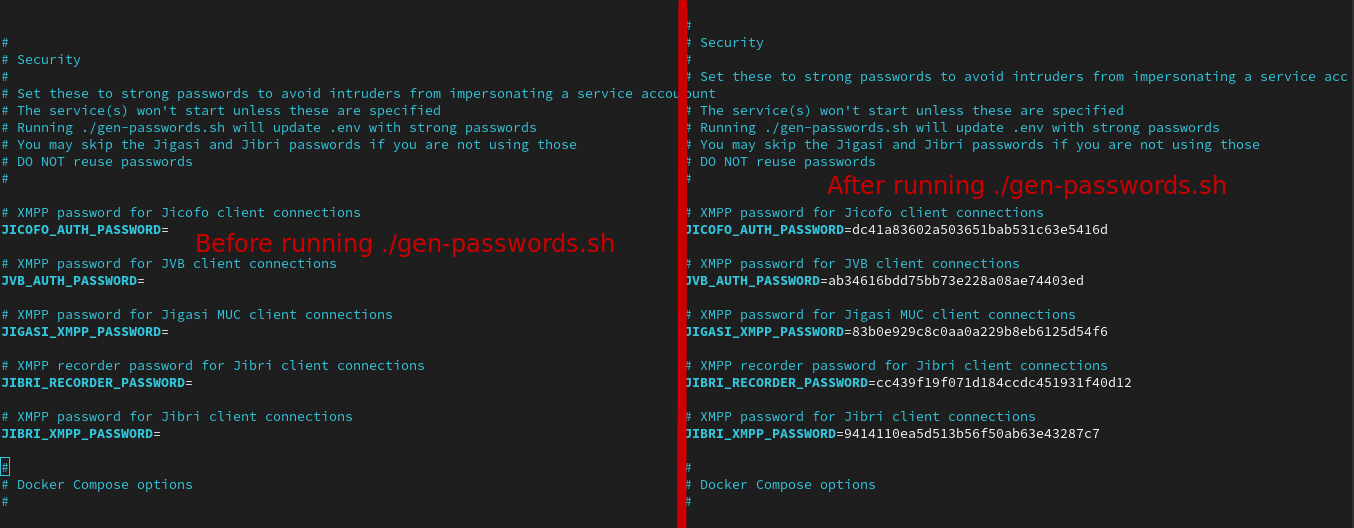
After generating a strong password, open the .env file and adjust those entries:
HTTP_PORT=80
HTTPS_PORT=443
PUBLIC_URL=https://meet.temfack.com # <== Your domaine name here
ENABLE_LETSENCRYPT=1
LETSENCRYPT_DOMAIN=meet.temfack.com # <== Your domaine name here
LETSENCRYPT_EMAIL=mail@temfack.com
Then, run the following command to start everything.
docker-compose up -d
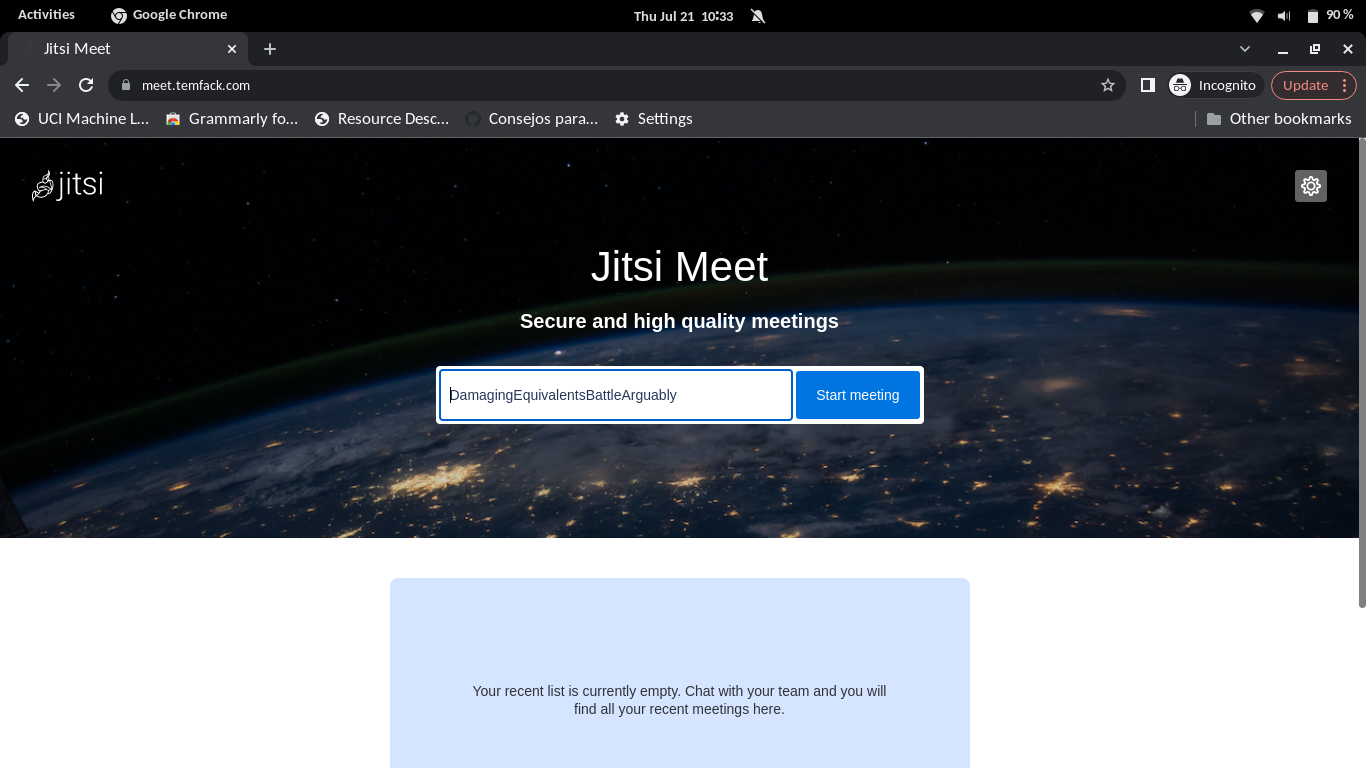
Navigate now to your domain name and voila, you have the result.
For further customization, feel free to explore the .env file to activate other options. For example, you can protect the usage of your Jitsi server with a password.
II-Deployment of Jitsi meet behind a reverse proxy server
With the way we have deployed Jitsi previously with docker, we cannot deploy any other application on port 80. If we have multiple web applications to be deployed on our server, we need to have a reverse proxy server that will be responsible to receive all traffic and routing everyone to the right target. There are multiple docker-based reverse proxy servers out there. We have for example Nginx-proxy-manager and Nginx-proxy. In this tutorial, we’ll use Nginx-proxy.
Installation of Nginx-proxy and acme-compagnon
Nginx proxy is a container running Nginx and docker-gen which is a service that generates reverse proxy configs for Nginx and reloads Nginx when containers are started or stopped.
This container is mounted on a docker socket to capture all events created by docker to be able to proxied any container with an env variable VIRTUAL_HOST define. All containers that want to be proxied by Nginx-proxy must be connected to the same network. To know more about Nginx-proxy, visit the GitHub of the project.
ACME-compagnon is a compagnon for Nginx-proxy responsible to automate the creation, renewal, and use of SSL certificates for proxied Docker containers through ACME protocol. For more information about acme-compagnon, visit the GitHub of the project.
I have a ready-to-use template for Nginx-proxy in my Gitlab repository. You need to clone and run it. This configuration is well-suited for a production environment. Just type the following command in your terminal to make it run in less than a minute.
cd ~
git clone https://gitlab.com/tderick/nginx-proxy-conf.git
docker network create nginx-proxy
cd nginx-proxy-conf
docker-compose up --build -d
Modification of .env and docker-compose file
The last thing to do is to make some changes in the .env file and the docker-compose.yml file.
Mofidy theses lines in .env file
#HTTP_PORT=80
#HTTPS_PORT=443
PUBLIC_URL=https://meet.temfack.com # <== Your domaine name here
#ENABLE_LETSENCRYPT=1
#LETSENCRYPT_DOMAIN=meet.temfack.com # <== Your domaine name here
DISABLE_HTTPS=1
VIRTUAL_HOST=meet.temfack.com
LETSENCRYPT_HOST=meet.temfack.com
LETSENCRYPT_EMAIL=mail@temfack.com
Modify the docker-compose file in this way:
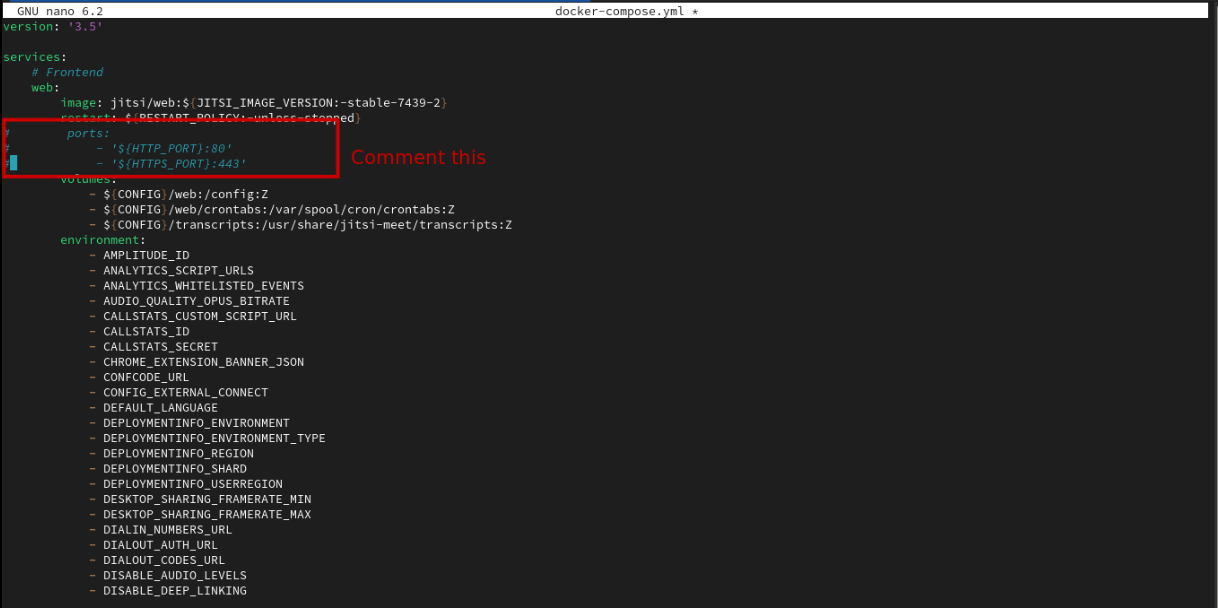
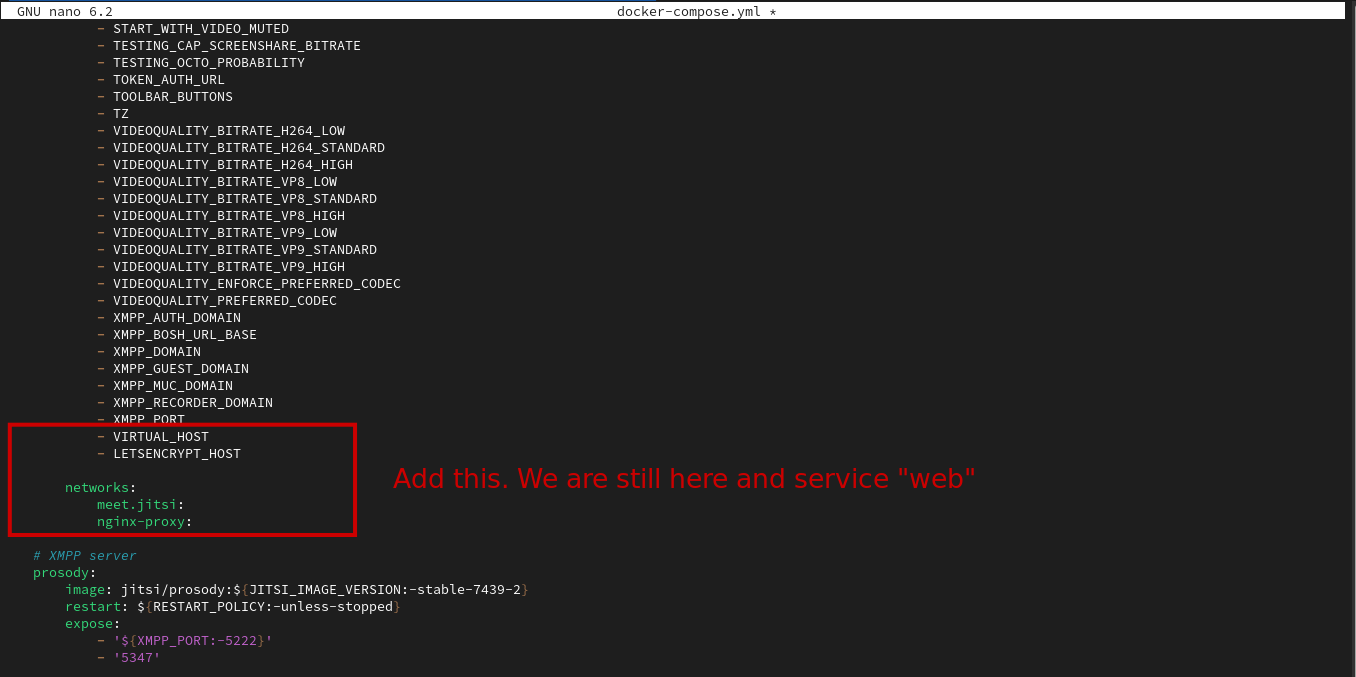

Then, run the whole with the following command:
docker-compose up -dIII- Turn on the Jibri component (Optional)
If you plan to make the videos recording or live streaming with your Jitsi instance, you need to run the Jibri module. Jibri is responsible to provide recording and streaming services to a Jitsi Meet conference. As Jibri is resource-intensive, only run it if you need it. For both cases, use the following command to run Jibri with the other component of Jitsi.
docker-compose -f docker-compose.yml -f jibri.yml up --build -dConclusion
In this post, you have learned how to deploy Jitsi meet in production in two ways: First time as the only application on the server and second time behind a reverse proxy server.

Hi, I’m Derick. I am a Software Engineer and DevOps pro. I specialize in turning complex business needs into automated workflows using Python, Odoo, and Go. I write engineering case studies here—sharing the architectural decisions and real-world code behind the solutions I build.