The first purpose of programming is to solve real-world problems. It is why in every major programming language in the world, people have developed a set of prebuilt functions and tools to speed up the development of products. With those prebuilt tools, programmers stay focused more on the problem they want to solve rather than building commonly used functions again and again. Those prebuilt functions are distributed to the developer community in the form of a Framework or packages.
A Framework in a programming world is a set of prebuilt software components and utilities that helps the programmer to better structure their code and quickly deliver the product they are working on without passing their time reinventing the wheel.
Every major programing language in the world come with one or more Framework on top of them. We have Django, Flask, FastAPI for Python, Ruby on Rails for Ruby, Spring for Java, and Symfony, Laravel for PHP.
Laravel, the web Framework for the web artisan with details in mind, is a very popular and growing Framework over the year. It has a rich and well-documented ecosystem to build all kinds of web applications you want. If you are a PHP developer and you search for a PHP Framework to continue your journey, Laravel is the way to go Framework.
The first version of Laravel was released in 2011. This blog post is a part of a series that introduces you to the Laravel world by building a simple contact form protected by Google ReCaptcha and an admin panel to manage messages sent through our contact form.
- Part 1: Your Amazing Initiation to Laravel Framework (This tutorial)
- Part 2: How to build a contact form with Laravel Framework
- Part 3: A simple admin panel for a Laravel contact form
- Part 4: How to build an authentication system with Laravel
- Part 5: How To Easily Delete Multiple Records In Laravel Using Checkbox
- Part 6: How To Add A Beautiful Delete Confirmation Message In Laravel
- Part 7: How to protect your Laravel forms with Google reCAPTCHA V3
In this particular blog post, we’ll:
- Initialize a fresh Laravel project
- Explain Laravel project structure
- Explore Laravel artisan command
I-Prerequisites for Laravel
This post is about Laravel Framework. So, to follow us along, you need some prerequisites on your computer.
- Have PHP installed
- Have Composer, the PHP dependency management, installed
II-Initialization of a Laravel project
Once your computer has PHP and composer installed, open a terminal in one folder in your computer where you want your Laravel project to be stored and then copy and paste the following command.
composer create-project laravel/laravel our-first-app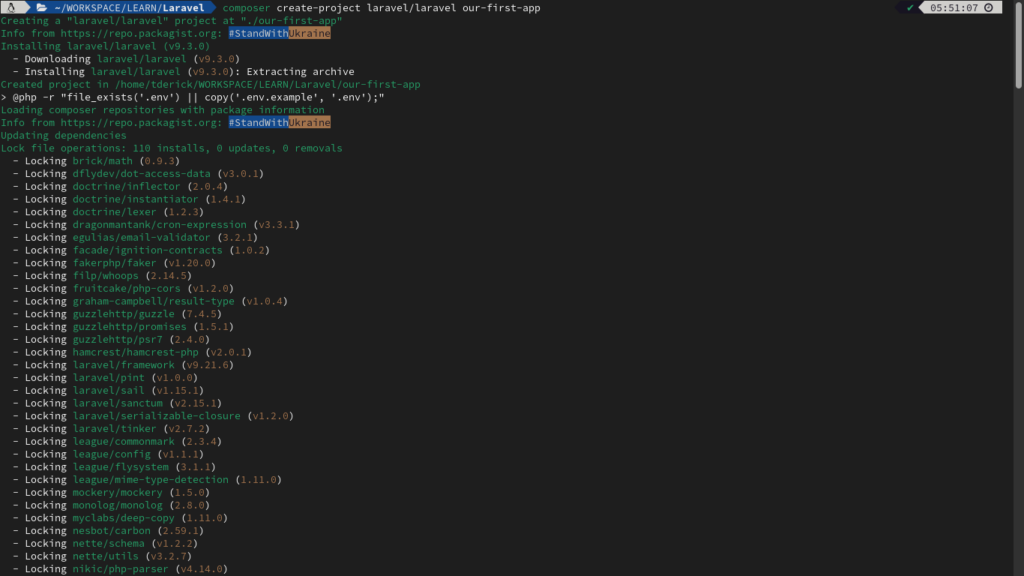
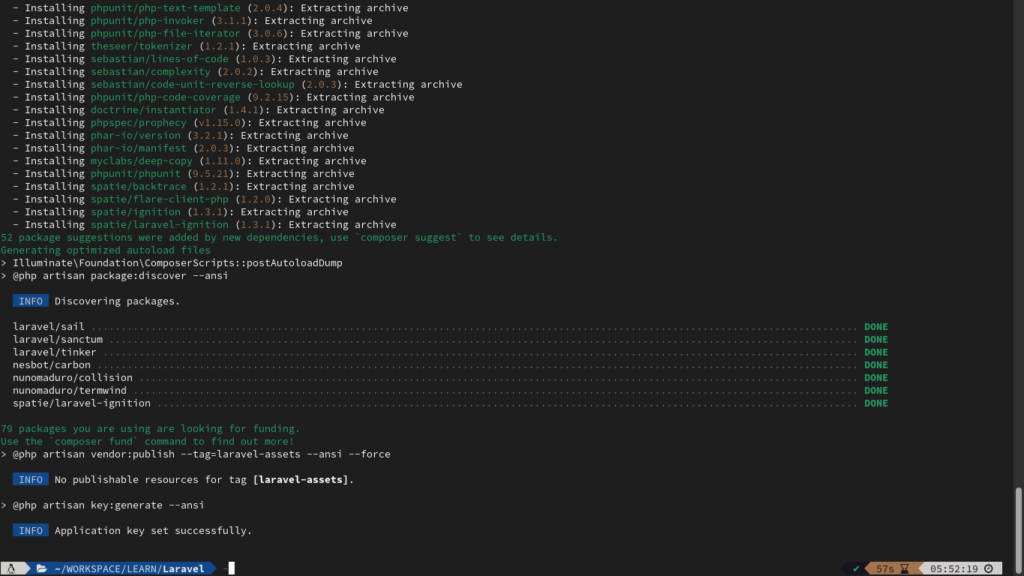
create-project is a composer command that creates a new project from a given package into a new directory. In other work, the previous command can be interpreted as “Hey composer, create me a new project from the package laravel/laravel in the directory called our-first-app”.
Some question you may ask yourself is where does the laravel/laravel package come from? Well, Composer looks for the package laravel/laravel in Packagist; the composer repository for PHP’s installable public package; and creates a new project from the template found there.
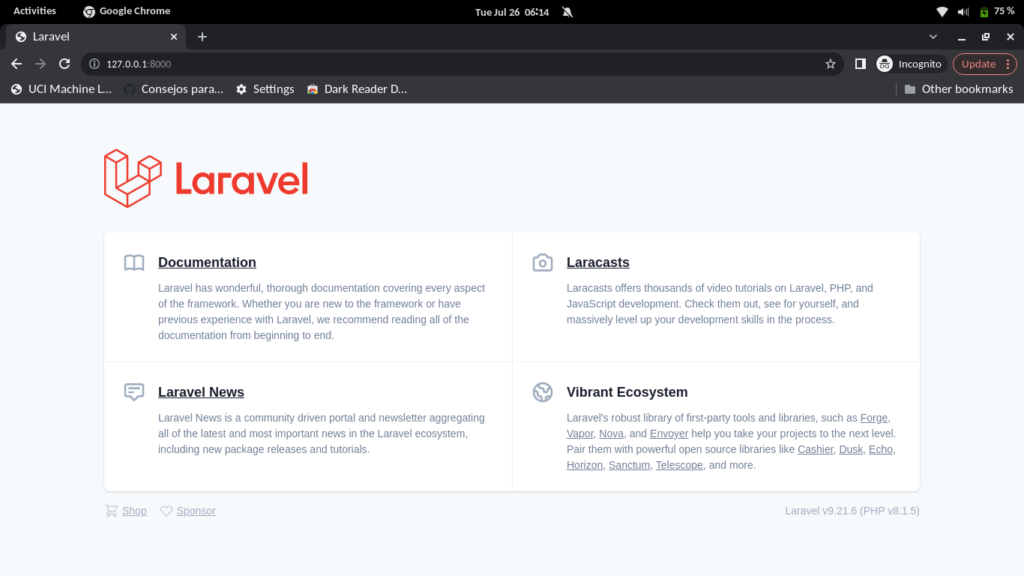
When the initialization of the project finishes, enter that directory and type the following command to start the development server. Go to http://127.0.0.1:8000 from your browser to view our first Laravel application.
cd our-first-app
php artisan serve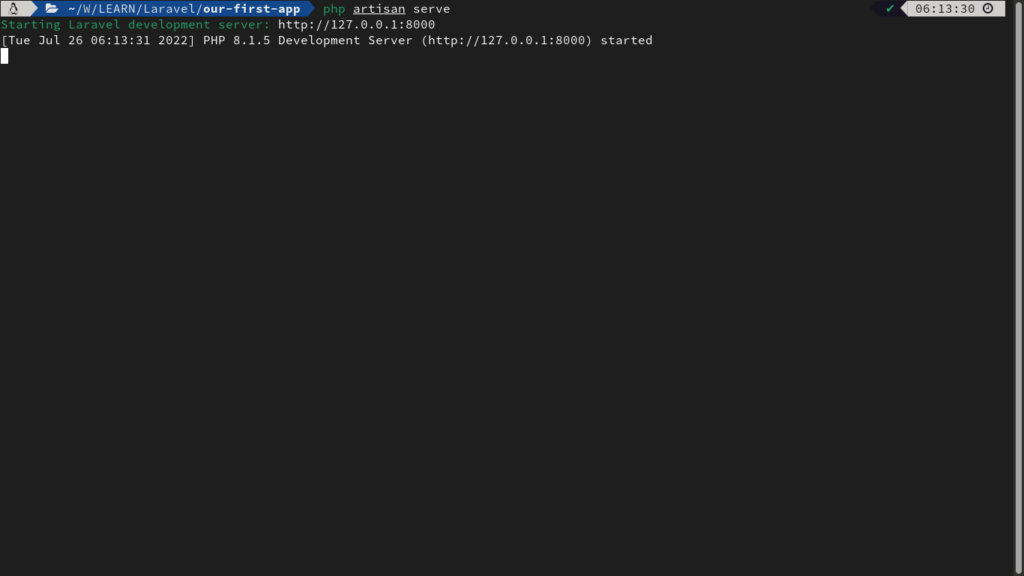
III-Laravel project structure
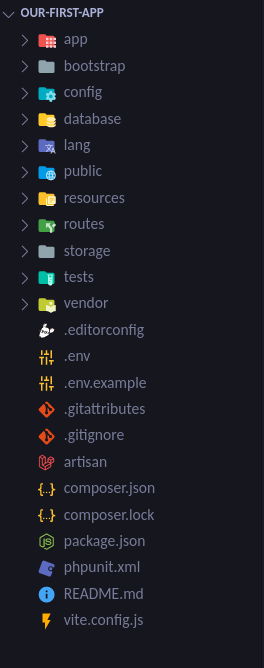
The full Laravel project structure is the following:
We are going to explore this structure from top to down and explain the usefulness of every part.
III-1- app directory
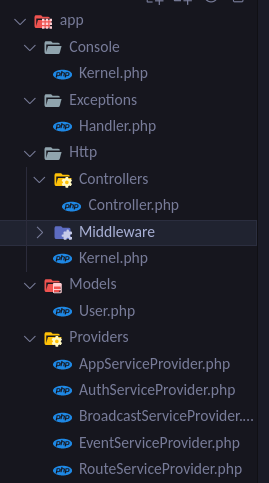
The app folder contains the core code of our application. It’s where the major part of our business logic will be. In that folder, we have four subfolders: Console, Exceptions, Http, Models, Providers
Console folder
This is the folder where we create custom Artisan commands for our project. Those commands we create can be used through php artisan commands like the one we have used to start our server (php artisan serve). When you initialize a fresh Laravel project, that folder only contains the file Kernel.php which is where we register custom Artisan commands for our project.
Exceptions folder
This folder is where we create any exception that can be thrown by our application. This directory contains by default the file Handler.php which let us customize the way our exception will be rendered.
Http folder
The Http folder contains two subfolders: Controllers and Middleware.
Laravel is a Framework based on MVC(Model-View-Controller) architecture. The Controllers folder here is where we place all our controller files responsible to handle clients’ requests. In this way, our code is well organized in the sense we exactly know where to find what.
The middleware is something between a client request and a controller. In other words, all client’s requests are passed through middleware before arriving at the controller where the request will be handled. So we can check the client request to verify if it meets certain criteria in the middleware before performing some actions. To be more concrete, let’s suppose we want to block requests from clients from a particular country. In that case, the only thing we need to do is to create a middleware responsible to check the country of every user and block users from the restricted country. It’s why some people use VPNs to get around this type of restriction. In Laravel, all middleware we can create is stored in the Middleware folder.
Models folder
The Models folder contains all models that would be matched to our database by the Laravel ORM(Object-Relational Mapping) Eloquent to simplify the process of querying our database. Each table in our database will have a corresponding Model in the Models folder.
Providers folder
The Providers folder is where the providers for our application are stored. We’ll cover the concept of provider in a dedicated tutorial.
III-2- bootstrap folder
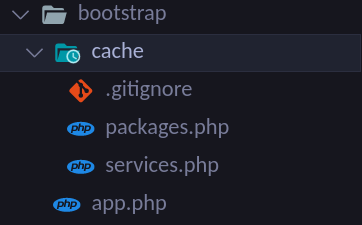
This folder contains the app.php file which is responsible to initialize a new instance of a Laravel application. The app.php file is super important and without it, our Laravel project can’t work. The cache folder only contains files responsible for performance optimization and services caching.
III-3- config folder
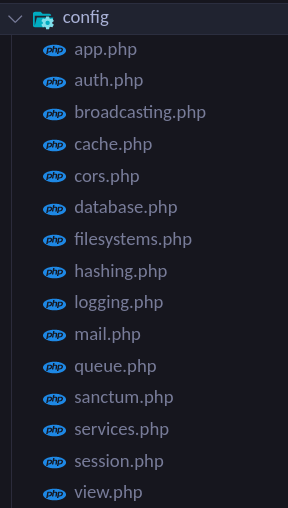
This folder contains all the configurations of our applications. The good news here is that many configs in those files in made through the .env file we’ll see later. Always keep in mind that whether you want to configure something in your application, you should come here to find the proper file to do that. Every filename is very explicit and the content is well documented.
III-4- database folder
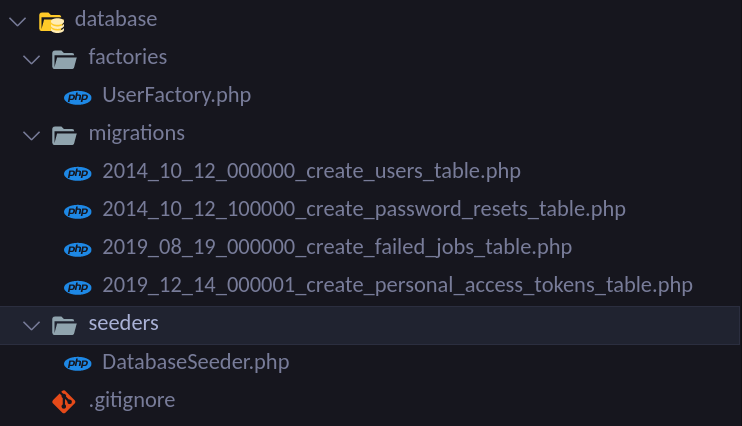
This directory contains three subfolders: factories, migrations, and seeders folders. The factories folder is where we place the factory class that would tell us how to populate our database with fake data. The seeders folder instead is used to store the files used to populate the database. Seeders use factories to simplify the process of populating a database with fake data.
The migrations folder is where all our migrations are stored. Laravel’s migrations are used to automatically create tables and tracked their versions.
III-5- lang folder
The lang folder is used to build multi-lingual web applications with Laravel.
III-5- public folder
The public folder is the public space of our web application. Everything present there is accessible through a web browser without the need to pass by a controller. It’s why all assets such as images, JavaScript and CSS are stored there so the web browsers can easily fetch them. This directory also contains a file called index.php used to configure autoloading provided by the composer. This file is also the entry point for all requests entered in our application.
III-6- resources folder
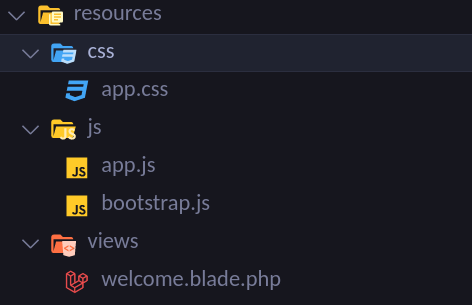
In the resources folder, we have a subfolder called css which contains the uncompiled CSS file, the js subfolder containing the uncompiled JavaScript file, and the views folder containing all the views files for our Laravel applications.
III-7- routes folder
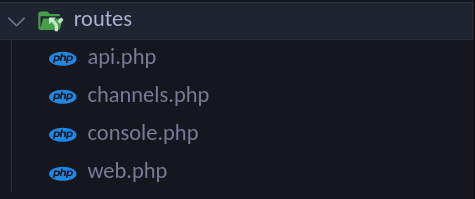
The routes directory contains four files: api.php, web.php, channels.php, console.php
The api.php file is where we declare all the routes of our application in case we are building a REST API and the web.php file is where we declare routes for other types of laravel applications. The channels.php is usually used to build real-time applications like real-time-chat applications.
III-8- storage, tests, vendor folders
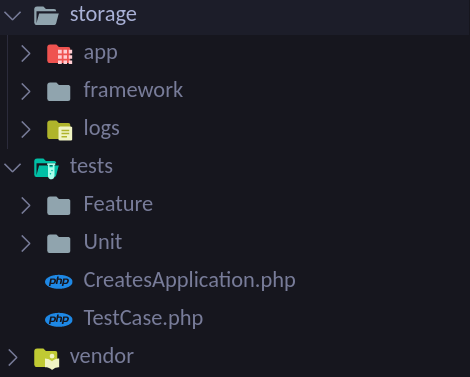
The storage folder is where files like the documents or images the users upload to our application are stored. It also contains log files and compiled blade templates.
The tests folder contains automated tests file like unit tests.
The vendor directory contains Composer dependencies. In other work, the dependencies we install via the composer install command.
III-4- The remaining files
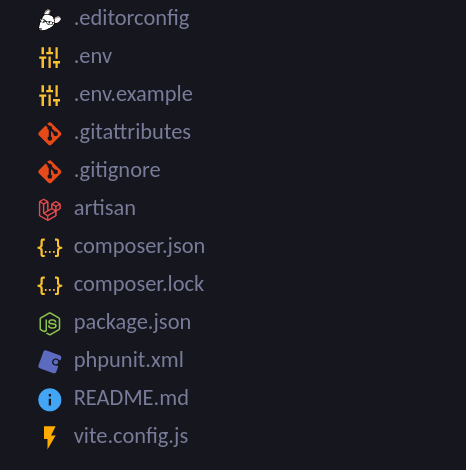
The .editorconfig file contains the different configurations for our editor like the encoding used and the number of spaces for indentation.
The .env and .env.example are files that contain the configuration used in the config folder to configure our application. As .env is not tracked by a version control system because it contains sensible data, the .env.example helps the new developer in our project to know what environment variable to configure.
The artisan file is the one that allows us to run the php artisan command.
IV- The Laravel Artisan commands
Laravel comes with a command line interface called Artisan which is a PHP script to make the life of Laravel developers easy. All those commands are managed by the artisan file we have seen earlier. Note that every package you install on your Laravel application might come with their Artisan command to simplify the work with that package. To see the list of available commands available to us at the initialization of a fresh Laravel project, type the following command:
php artisan list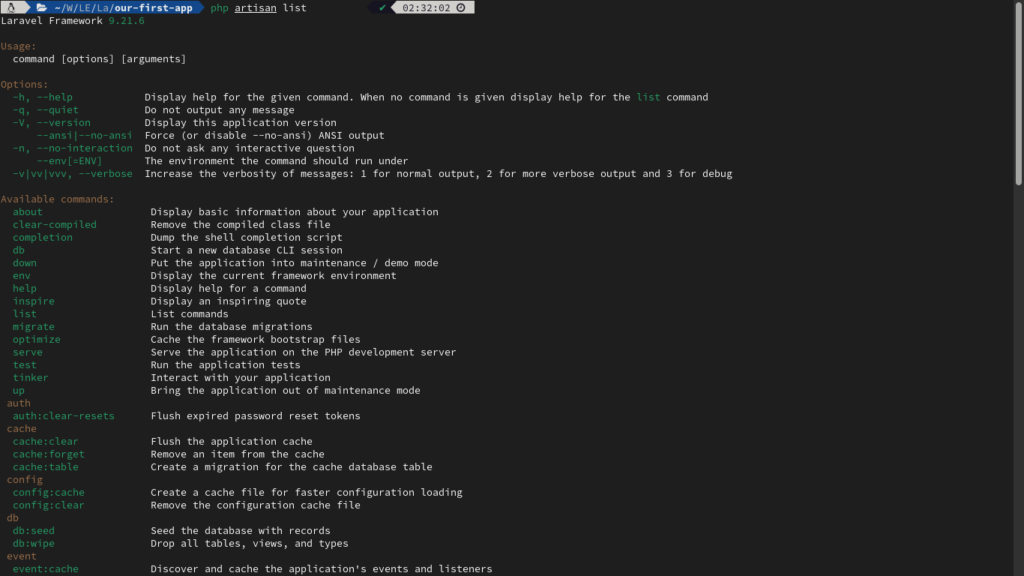
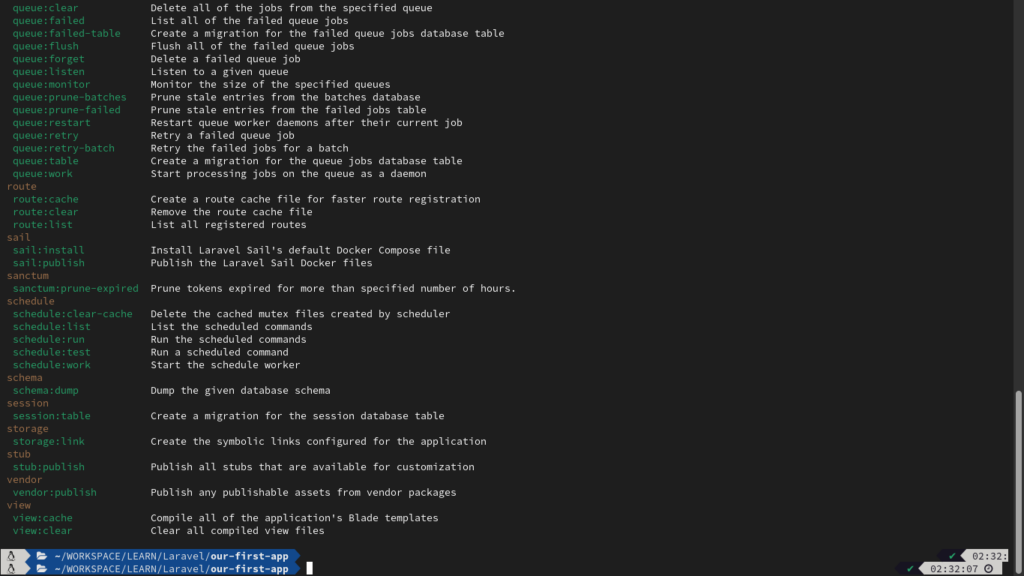
As you can see, every command comes with a small description to explain what it do. in the upcoming tutorials, we’ll extremely use this artisan command during the development of our Laravel application.
If development isn’t your field, consider hiring Laravel specialists who can supercharge your application’s scalability and performance with precision.
Conclusion
In this blog post on the initiation to Laravel, we have learned what Laravel is and have initialized a fresh Laravel project. We have also explained the Laravel project structure and presented the artisan command tool interface. In the next tutorial, we’ll implement a contact form in Laravel to understand well how to work with this amazing Framework. See you in the next tutorial.

I am a Master’s student in computer science passionate about DevOps, Cloud Computing, AI, and BI. I am also a web developer, especially with Django and Laravel Frameworks. I love to share things that work for me with others to save them time searching through the internet to solve the same problem.

8 thoughts on “Your Amazing Initiation to Laravel Framework”